(continued from Daily Operation Tips)
(continued from Installation At the Restaurant)
The steps to place an online order can occur in any sequence Example: a customer can go directly to the menu to start ordering and then return to change the “Order Information” later. In addition, the customer can always return to login or create an account at anytime during the process. This functionality invites new and existing customers to simply view the menu at their own discretion. The basic outline of placing an online order is as follows:
The following sections outline the steps the restaurant’s customers will use to place an online order.
New Customer / Existing Customer
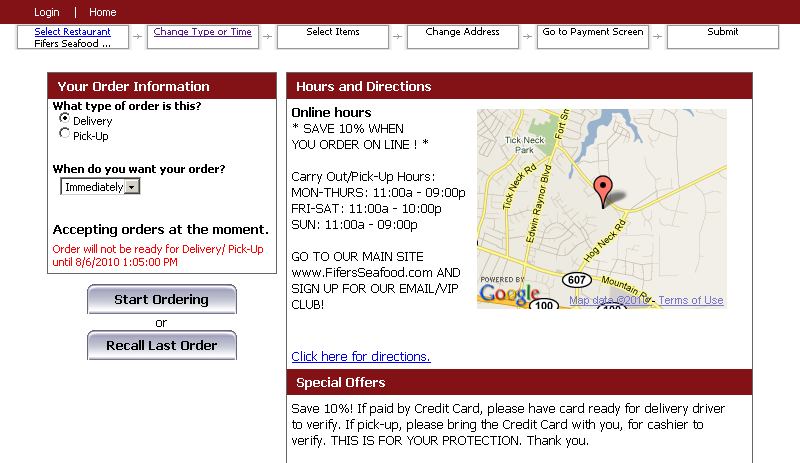
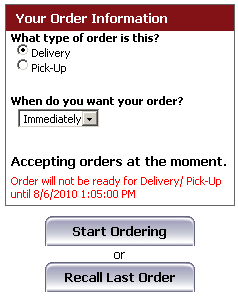
Customers will go to your restaurant’s web site, and when they choose to order a meal on line will be re-directed to your restaurant’s specific Online Ordering portal. If there are multiple restaurants to choose from, after they select the restaurant of their choice, they will be presented with a page similar to below)
This section outlines the steps to navigate to a web site and enter the customer information necessary for placing an online order.
The below is a sample screen of a customer’s web site
Selecting the Order Online option will lead the customer directly a similar Online Ordering Portal pictured below:
This section details the steps the customer will use to add menu items to the online order:
Click on REMOVE from the virtual guest check to remove it from the order.
Click on the MODIFY button on the virtual guest check to change items associated with the menu item.
Use the following steps to finish the ordering process:
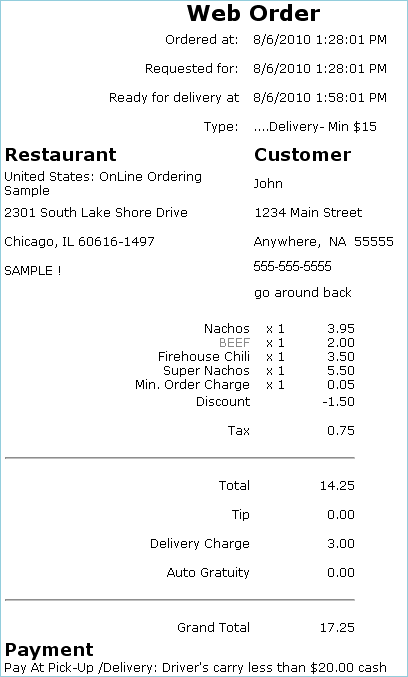
Once the order has been paid for, and accepted by the restaurant, a screen similar to the one below will appear:
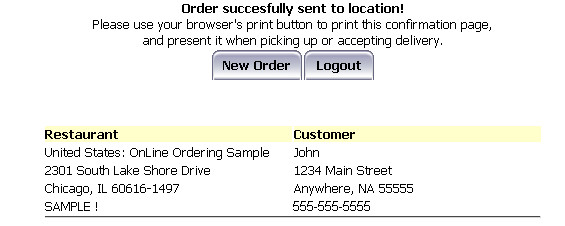
At this point you will want to use the browsers print button to print the confirmation page. This step is not required if a printer is not available. In addition, a confirmation email will be sent to the customer account email address:
Your particular establishment may prefer to take customer order via a centralized call center rather than have the customer place the order themselves. If you have chosen this option you will need the following:
- Bookmark, etc
- Desktop short cut, etc
- Toolbar Link, etc.
Placing order via a Center is similar to the steps a customer would perform via the web. There are some extra steps which are detailed below:
Account Field- enter login name
Password Field- enter employee password
Login- Select Login button after entering information in Account and Password fields
Note: Login needs to be performed only once at beginning of shift.


- If the caller is already in the database the next screen will be the common URL or web page where a list of each location will be accessible. The Operator should select the location specified by the customer:
- If this is the customer’s first call (not in database) the operator will be presented a prompt asking if they want to add the new customer: select the “OK” button.
- The Operator will be present with a customer registration field where they must enter information in the data fields. Press the Next button when all necessary filed have been entered.
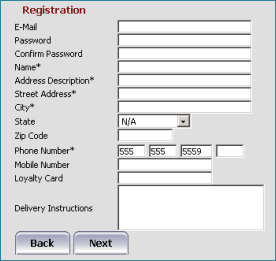
Note: It is highly recommended that the Operator enters a password on behalf of the customer. Failure to so this may have undesirable results for future orders placed directly by the customer. Please see the section on Passwords and Call Center for issue resolution.
- The next screen will be the common URL or webpage where a list of each location will be accessible. The Operator should select the location specified by the customer.
When a customer is registered via call center, he is not allowed to register again (direct OO) using the same phone number. This problem happens only when the call center agent DID NOT enter a password.
If this is so, the customer needs to call the call center and ask the agent to edit his info -- the agent needs to enter email address and a bogus password (i.e., 12345). To protect his account, the customer should then log in and edit his info ASAP to change the password given by the agent. If during customer registration, the agent DID enter a password (although this is not req.)
The customer can log in directly to OO by:
In this case, the customer may opt to put in his email address and edit his password (for security purposes) and use the email to log in for his future online orders.
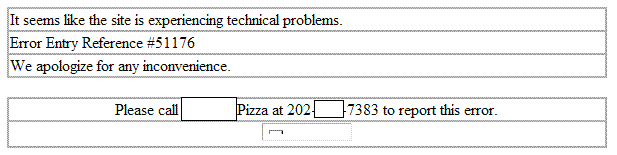
If customers place an order, and it does not go thru to the POS, the customer will receive and error message similar to the one below:
If your system is programmed as such, the ADMINISTRATOR on record with online ordering will also receive an “ORDER DUMP” failure notification, as seen below:
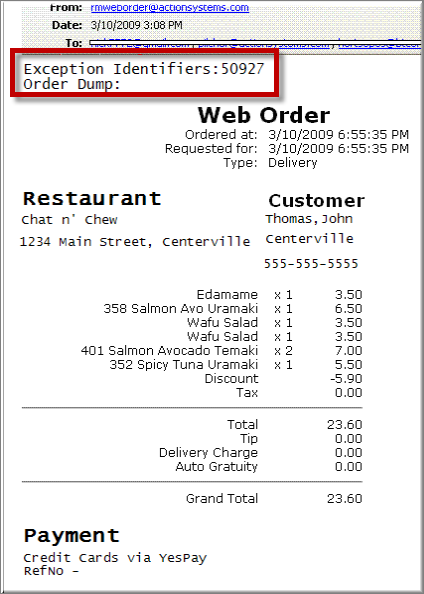
It’s important to note that if the ADMINISTRATOR gets an email that reads “ORDER DUMP”, the order did not go through the POS. However, in most cases you will have all the information available for contacting the customer to: